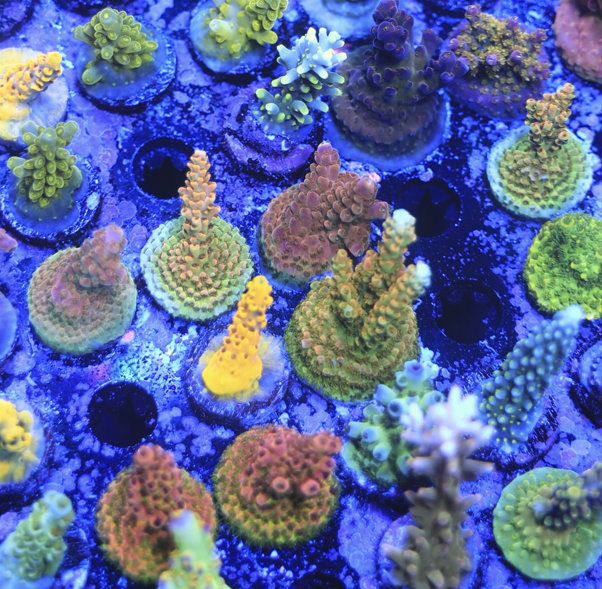
Welcome to your go-to guide for fragging and mounting coral! Whether you're just getting started with your reef tank or you’ve been at it for years, learning how to frag and mount coral is a skill that can really take your aquarium to the next level. Not only does fragging help you grow your coral collection, but it’s also a great way to share the love with fellow reef enthusiasts. In this guide, we’ll cover everything you need to know, from the basic tools to step-by-step instructions that will help you frag and mount coral like a pro. So, let’s dive in and get started!
Why Should You Frag Coral in Your Reef Tank?
Fragging coral is more than just a useful skill—it’s an essential practice for maintaining a thriving reef tank. Here’s why:
- Manage Coral Growth: Corals can quickly outgrow their space, leading to competition and stress among your tank’s inhabitants. Fragging helps you keep their size in check, ensuring a balanced environment.
- Shape Your Tank: Fragging allows you to control the size and shape of your corals, letting you design your tank layout exactly how you want it.
- Expand Your Collection: With fragging, you can propagate new coral colonies from the ones you already have, giving you more flexibility to fill your tank with a variety of corals without constantly buying new ones.
- Share and Trade: Fragging opens up opportunities to share your coral frags with fellow reef enthusiasts or trade them for different varieties, helping you diversify your tank.
Coral Fragging is a powerful tool for any reef keeper. It not only helps you maintain the ideal size and shape of your corals but also allows you to have more control of space in your tank for a variety of other corals.
What Tools and Materials Do You Need for Coral Fragging?
Before you start fragging your corals, it’s important to have the right tools and materials on hand. Here’s what you’ll need to get the job done right:
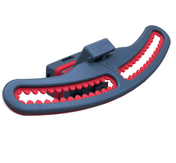
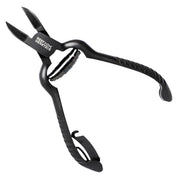
- Coral Cutters/Bone Cutters: These are your go-to tools for making precise cuts, especially for hard corals like SPS (Small Polyp Stony) and many LPS (Large Polyp Stony) corals. They help you make clean coral cuts that minimize stress on the coral.
- Scissors: For softer corals, like Zoanthids or leather corals, sharp scissors will do the trick. They allow you to make smooth, controlled cuts.
- Dremel or Fragging Saw: For LPS corals with more fragile skeletons, such as Euphyllia species, you might need a Dremel or fragging saw to make clean cuts without damaging the coral’s structure.
- Frag Plugs or Discs: These are small platforms that you’ll use to mount your coral frags. They come in various shapes and materials, but they all serve the same purpose—giving your frags a stable surface to attach to and grow.
- Reef-Safe Super Glue Gel: This is what you’ll use to attach the coral frags to the plugs or discs. Make sure it’s reef-safe, as some glues contain chemicals that can harm your tank’s inhabitants.
- Reef-Safe Epoxy: For larger or heavier frags, reef-safe epoxy can be used to secure them more firmly to the frag plug or rock. It’s particularly useful in high-flow areas where glue alone might not hold.
- Tweezers: These are handy for handling small or delicate coral fragments, ensuring you can place them precisely without causing damage.
- Container of Tank Water: You’ll want to keep your coral frags hydrated during the process, so having a small container of tank water nearby is essential.
- Protective Gear: Gloves and eye protection are a must, especially when working with corals that can release toxins, like Palythoa. Safety first!
Having these tools and materials ready will make the fragging process smoother and more successful. Plus, with the right gear, you’ll be able to frag and mount coral confidently, knowing you’re using the best practices for your reef.
Step-by-Step Guide on How to Frag Coral
Now that you’ve got your tools ready, it’s time to get hands-on with fragging. Follow these steps to ensure a smooth and successful fragging process:
1. Selecting the Coral to Frag
Start by choosing a healthy, well-established coral in your tank. Look for corals that have grown to a size where a small piece can be removed without harming the parent colony. For branching corals like Acropora or Birdsnest, you might select a small branch. For soft corals like Zoanthids, look for a section of the mat that can be easily separated.
2. Removing the Coral from the Tank
Carefully remove the selected coral from your tank and place it in a small container filled with tank water. This step helps minimize stress on the coral and keeps it hydrated while you work.
3. Making the Coral Cut
- For SPS and Many LPS Corals: Use coral cutters or bone cutters to make a clean, precise cut. For LPS corals with fragile skeletons, such as Euphyllia, you might need to use a Dremel or fragging saw to make sure the cut is smooth and doesn’t damage the structure.
- For Soft Corals: Sharp scissors work best for cutting through the soft tissue. Make sure to make a clean cut to avoid tearing the coral, which could lead to stress or infection.
Tip: When cutting branching corals, try to cut at an angle to increase the surface area, which can promote faster healing and growth.
4. Minimizing Stress
Work quickly but carefully to minimize the time the coral spends out of water. The less time the coral is exposed to air, the better it will recover. After making the cut, gently rinse the frag in the container of tank water to remove any debris or slime.
5. Preparing the Frag for Mounting
After cutting, your coral frag is ready to be mounted. Here’s a pro tip to maximize the strength of the bond:
- Apply a small amount of reef-safe super glue gel to the frag plug.
- Add a small ball of reef-safe epoxy on top of the glue.
- Then, add another drop of super glue gel on top of the epoxy before placing the coral frag.
This layering technique uses the different properties of glue and epoxy to create an extra-strong hold, especially in high-flow areas or with heavier frags.
6. Allowing the Frag to Cure
Once the frag is attached to the plug using the glue-epoxy-glue method, place it back into the container of tank water to allow the adhesive to fully cure. This typically takes just a few minutes. Once the frag is secure, it’s ready to be reintroduced to your tank.
Mounting the Coral Frag
Once your coral frag is securely attached to a plug, the next step is to mount it onto your rockwork or frag rack in your tank. Here’s how to do it effectively:
1. Preparing the Frag Plug for Mounting
Your coral frag is already on a plug, so now it’s time to decide how you want to mount it. You have the option to clip the bottom of the plug, which will provide a less intrusive and more natural look, making it easier to fit the frag into specific crevices or spots in your aquascape. If stability is your main concern, you can leave the plug intact to provide a solid base for the frag.
2. Applying the Glue and Epoxy
To ensure the frag stays securely in place, use the glue-epoxy-glue method:
- Apply a small amount of reef-safe super glue gel to the bottom of the frag plug.
- Add a small ball of reef-safe epoxy over the glue.
- Top it off with another drop of glue on the epoxy before placing the plug onto the rock or frag rack.
This layered approach combines the strengths of both glue and epoxy, providing a strong bond that’s especially useful in high-flow areas.
3. Attaching the Frag Plug to the Rock or Frag Rack
Carefully press the frag plug onto the rock or rack, holding it in place for a few seconds to allow the glue to begin setting. Make sure the plug is secure, and that the frag is positioned correctly with the coral facing the desired direction for optimal light and flow. Once placed, the frag should remain in that spot for a few months to become accustomed to the area and heal properly. Frags should only be moved if they aren't looking good or if they’re not adjusting well to their new location.
4. Allowing the Adhesive to Cure
Once the plug is attached, give the adhesive a few minutes to fully cure. Avoid disturbing the frag during this time to ensure a strong bond.
Securing and Mounting Your Coral
Once the frag is securely attached to a plug, the next step is to mount it onto your rockwork or frag rack in your tank. Here’s how to do it effectively and ensure your frag thrives in its new environment:
1. Preparing the Frag Plug for Mounting
Your frag is already on a plug, so now it’s time to decide how you want to mount it. You have the option to clip the bottom of the plug, which will provide a less intrusive and more natural look, making it easier to fit the frag into specific crevices or spots in your aquascape. If stability is your main concern, you can leave the plug intact to provide a solid base for the frag.
2. Optimal Placement in the Tank
Before securing the frag to your rock or rack, consider the specific needs of the coral species. Proper placement is key to the frag's success:
- Light Intensity: Different corals require varying levels of light. Place high-light corals, like most SPS (Small Polyp Stony) corals, near the top of the tank, while LPS (Large Polyp Stony) and soft corals may prefer lower light levels.
- Water Flow: Ensure the frag is positioned in an area with appropriate water movement. SPS corals generally thrive in higher flow areas, while LPS and soft corals often prefer moderate to low flow.
- Proximity to Other Corals: Be mindful of the distance between your new frag and existing corals. Some corals can engage in chemical warfare or extend sweeper tentacles, which can harm nearby frags.
3. Applying the Glue and Epoxy
To ensure the frag stays securely in place, use the glue-epoxy-glue method:
- Apply a small amount of reef-safe super glue gel to the bottom of the frag plug.
- Add a small ball of reef-safe epoxy over the glue.
- Top it off with another drop of glue on the epoxy before placing the plug onto the rock or frag rack.
This layered approach combines the strengths of both glue and epoxy, providing a strong bond that’s especially useful in high-flow areas.
4. Attaching the Frag Plug to the Rock or Frag Rack
Carefully press the frag plug onto the rock or rack, holding it in place for a few seconds to allow the glue to begin setting. Make sure the plug is secure, and that the frag is positioned correctly with the coral facing the desired direction for optimal light and flow.
Once placed, the frag should remain in that spot for a few months to become fully accustomed to the area and heal properly. Moving the frag around too soon can stress the coral and hinder its growth. Only consider relocating the frag if it’s showing clear signs of distress and isn’t thriving in its current position.
5. Monitoring the Frag
After mounting, keep a close eye on the frag over the next few weeks. Watch for any signs of stress or poor acclimation, such as:
- Discoloration: Fading or darkening of the coral’s color can indicate that it’s not receiving the right amount of light or that water parameters need adjustment.
- Polyp Retraction: If the coral’s polyps are retracted for extended periods, it may be stressed due to flow, light, or water quality issues.
- Tissue Recession: This is a more serious sign that the coral is not adapting well and could indicate the need for relocation within the tank.
Fragging and mounting coral is an essential skill for any reef enthusiast, whether you’re looking to expand your coral collection, share frags with others, or simply maintain the health and beauty of your tank. By following the steps outlined in this guide, you can confidently frag and mount coral, ensuring that your frags thrive in their new environment.
Remember, the key to success is careful preparation, proper placement, and diligent monitoring. With the right tools and techniques, your coral frags will grow into vibrant colonies. Whether you’re a beginner or an experienced hobbyist, mastering these skills will take your reef-keeping journey to the next level.
Happy fragging!
